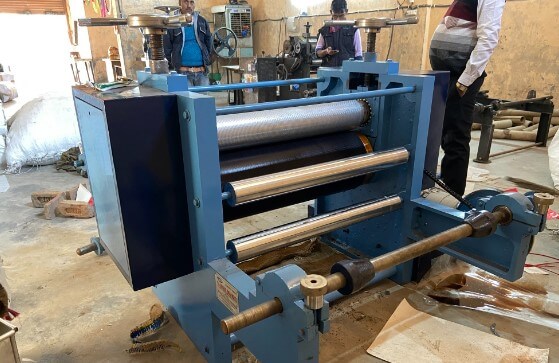
Embossing Machine Maintenance: Tips for Longevity and Optimal Performance

Use an Embossing Machine to elevate your card-making to a whole new level. Utilize this great approach to transform your homemade goods from simple to ultra-professional. Although the outcomes are amazing, the process is quite simple to learn. To get started, gather a few necessities, and you can begin creating incredible embossed designs. We’ll walk you through all the embossing requirements you should have on hand. Also we will show you how to attempt embossing yourself with the aid of our helpful guide.
Embossing Techniques
- Blind emboss: The embossed area is not highlighted with ink or foil. The only distinguishable variation is in the material’s dimensional appearance, which results in a clear and unique image on the paper. The ideal way to use blind embossing is to make a subtle imprint.
- In the Registered Emboss method, the embossed image is positioned in relation to a different element consisting of foil, ink, or another embossed image.
- Combination embossing involves embossing and foil-stamping simultaneously, imprinting and positioning foil over the embossed image. A combination die combines both processes in one step. The combo die, with a cutting edge, neatly separates extra foil from the embossed region.
Making Designs For Embossing
Creating A Vector
You should produce vector imagery for your embossing designs. When output to film, vector lines stay clear and are essentially resolution independent. Raster art produces a metal die with a jagged edge that has a significant likelihood of piercing your paper when used to create a die.
Area
Your embossed area will be deeper the larger it is. On the other hand, you will need to make the embossed area larger the deeper you want you emboss to be. Embossing enhances the appearance of foil, as it reflects light and its surroundings more effectively. You may make the surface catch the light in different locations across the surface by giving it a bevel and edges.
Material
It just looks better when the foil is embossed. Light and its surroundings are reflected by foil. You may make the surface catch the light in different locations across the surface by giving it a bevel and edges.
Level Of Intricacy
It is nearly always a waste of effort to pair embossing with intricate artwork (where the artwork includes depth, shadows, and highlights). Your imprint will be obscured by the artwork and may even appear distorted. There is practically a law of inverse proportions at play here: the simpler your emboss, the more straightforward your artwork should be. Additionally, your artwork should be simpler the more detailed and difficult your embossing design is.
Take Help From Experts
It’s critical to build a solid working relationship with your printing partner, just like with die-cutting and foil-stamping. By showing your design to an expert embosser early on, you can avoid manufacturing difficulties. Considering that embossing is the final step in the finishing process, careful registration is essential, especially concerning where the emboss aligns with printing.
Embossing
The final step in completing your design is embossing. While the design may undergo additional phases like folding and gluing, the emboss is where the actual finishes are applied. An embossed surface cannot be spot glossed or matted, nor laminated. When developing your design, keep this in mind.
Tips: What You Should Know About Embossing Before You Start
Before you begin embossing, you should consider the following advice.
- Instead of porous paper, use flat paper.
- Before you begin, wipe the surface with a dryer sheet or an embossing powder bag. By doing so, you will prevent any extra embossing powder from getting on the surface you are trying to emboss.
- To remove any extra powder, use a gentle paintbrush or dusting cloth.
- To ensure that your embossing powder adheres more uniformly, use slow-drying inks.
- Empty your embossing powder into a large container to keep your workspace tidy. After that, you can add the powder to the container while holding your paper over it. Just tap the excess off after adding the powder.
Conclusion
Adding texture through embossing is a fun way to improve the value of your DIY craft. It will not only make your product look creative but also improve your brand image. If you have never tried embossing before this is the perfect chance for you.


